


Understanding Vapor Barrier Installation
What is a Vapor Barrier?
A vapor barrier is a material specifically designed to resist the movement of moisture through walls, ceilings, and floors in buildings. It plays a critical role in maintaining a controlled environment, particularly in areas susceptible to humidity, like crawl spaces and basements. Generally made from materials such as polyethylene or foil, vapor barriers are essential for preventing moisture damage, mold growth, and structural deterioration.
Importance of Vapor Barrier Installation
The installation of a vapor barrier is vital for numerous reasons. Firstly, it protects the structural integrity of your home by preventing moisture intrusion that can lead to wood rot, corrosion, and mechanical failures. Secondly, a properly installed vapor barrier enhances energy efficiency by minimizing heat loss and gain, which can help to reduce heating and cooling costs. Additionally, it contributes to a healthier living environment by curtailing mold growth and improving air quality. Understanding the benefits of proper Vapor Barrier Installation is crucial for homeowners looking to maintain their property effectively.
Key Considerations Before Installation
Before jumping into the installation process, there are several important considerations to take into account. First, assess the current state of your crawl space or basement, identifying any existing moisture issues that may necessitate additional repairs prior to vapor barrier installation. You’ll also need to consider the local building codes, which can dictate the type and thickness of materials you are allowed to use. Lastly, differentiate between warm and cold climate installations, as this can impact the type of materials appropriate for your specific situation.
Materials Used in Vapor Barrier Installation
Choosing the Right Vapor Barrier Material
Choosing the right material for your vapor barrier is critical for ensuring effectiveness. Common materials include polyethylene sheeting, foil, and spray-on membranes. Polyethylene is favored for its moisture-resistant properties and affordability, while foil barriers are effective in reflecting heat, making them suitable for hot climates. When selecting a vapor barrier, consider factors such as the thickness of the material, which should typically be at least 6 mils for resilience.
Durability and Effectiveness Factors
The durability and effectiveness of your vapor barrier will largely depend on its quality and the conditions of installation. High-quality materials resist tearing and puncturing, which helps maintain their moisture-resistant properties over time. Consider the environmental conditions of your area—excessive humidity or fluctuating temperatures can degrade materials faster. Furthermore, ensure that installation practices adhere to manufacturer guidelines to improve durability.
Local Climate Considerations
Your local climate significantly impacts your vapor barrier choice. For instance, humid climates often require more robust moisture control solutions, such as thicker polyethylene films or specialized membranes that can handle more moisture. Meanwhile, homes in drier climates may only need minimal vapor barriers, focusing more on insulation properties than moisture control. Understanding your local environmental conditions will help guide your decisions on materials and installation practices.
Step-by-Step Guide for Vapor Barrier Installation
Preparing the Crawl Space for Installation
Preparation is key to a successful vapor barrier installation. Start by cleaning the crawl space thoroughly, removing any debris, mold, or moisture sources. If you discover any existing water issues, they must be resolved before proceeding. Ensure that the ground surface is as smooth as possible to allow for seamless installation of the vapor barrier. Check for drainage problems and consider installing a sump pump if necessary.
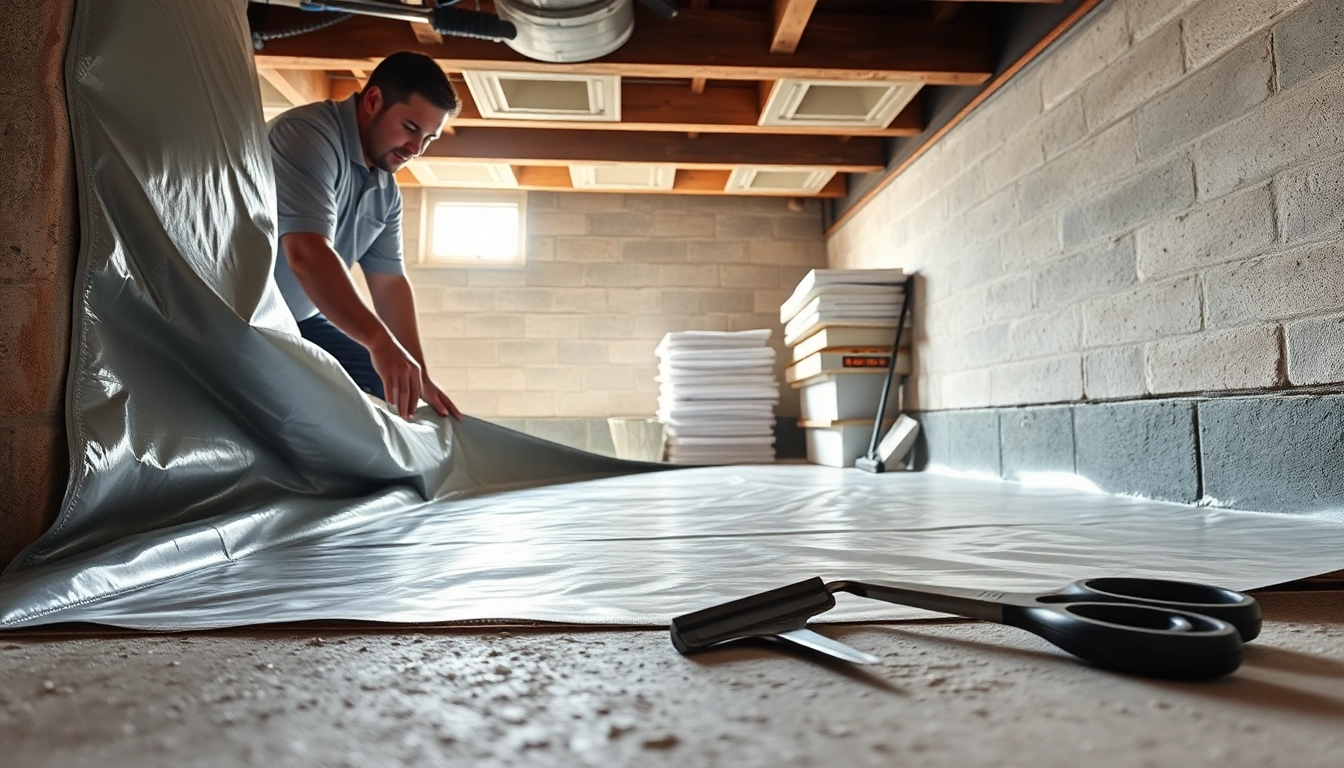
How to Properly Install a Vapor Barrier
Once the crawl space is prepared, follow these steps for effective vapor barrier installation:
- Measure the area accurately to ensure you purchase enough material.
- Roll out the vapor barrier across the entire ground surface, ensuring it extends up the walls at least 6 inches.
- Use either adhesive or double-sided tape to secure the barrier to the walls, making sure to create a tight seal.
- Overlap seams by at least 12 inches and seal them with duct tape or compatible adhesive.
- For areas with vents or access points, ensure that the vapor barrier is sealed properly to prevent moisture intrusion.
Finishing Touches to Ensure Effectiveness
After installation, inspect all joints and seams to ensure that everything is correctly sealed. This step is critical in preventing moisture from infiltrating your space. It may also be beneficial to install a dehumidifier to maintain optimal humidity levels in conjunction with your vapor barrier. Regular checks and maintenance will help identify any potential issues before they turn into significant problems.
Common Challenges During Vapor Barrier Installation
Identifying Moisture Issues
One of the most challenging aspects of vapor barrier installation is identifying existing moisture issues. Look for signs of dampness, or efflorescence (white powdery substance) on walls, as these can indicate ongoing moisture problems. Conduct a thorough inspection before installation, and, if necessary, consult a professional for a comprehensive evaluation and solutions to existing issues.
Overcoming Installation Hurdles
During the installation process, various hurdles can arise, such as difficult-to-reach areas or foundational constraints. Consider utilizing narrow strips of vapor barrier for tight spots, or enlisting additional help to manage cumbersome materials. Thorough planning and adequate preparation can significantly reduce the likelihood of facing significant hurdles.
Post-Installation Maintenance Tips
Post-installation, ensure that you maintain regular checks on your vapor barrier. Inspect for any possible tears or punctures and address them immediately. Furthermore, monitor your crawl space’s humidity levels and maintain them below 60% to ensure mold does not develop. If water intrusion occurs, be proactive in addressing these underlying issues to promote a healthy living environment.
Benefits and Impact of Proper Vapor Barrier Installation
Energy Efficiency Improvements
One major benefit of proper vapor barrier installation is improved energy efficiency. By minimizing moisture and maintaining stable indoor temperatures, your HVAC system won’t have to work as hard to maintain comfort, leading to reduced energy consumption and lower utility bills. Over time, these savings can greatly outweigh the upfront costs of installation.
Health Benefits for Home Residents
Proper vapor barrier installation helps create a healthier living environment. It significantly reduces the risk of mold growth and the proliferation of allergens, which can cause respiratory issues and other health concerns. This is especially crucial for families with young children, elderly members, or individuals with pre-existing health conditions who may be more sensitive to pollutants.
Long-Term Home Protection Strategies
Investing in a vapor barrier is an excellent long-term strategy for home protection. By preventing moisture infiltration, you are safeguarding your property’s structural integrity against foreseeable water damage and pest infestations. This proactive approach extends the lifespan of your home while ensuring its value remains intact over the years.
Frequently Asked Questions
1. How thick should a vapor barrier be?
A vapor barrier should typically be a minimum of 6 mils thick to effectively resist moisture. Thicker materials enhance durability and effectiveness.
2. Can I install a vapor barrier myself?
Yes, installing a vapor barrier can be a DIY job for those comfortable with home improvement tasks, provided you follow best practices and safety guidelines.
3. Do I need to ventilate my crawl space if I install a vapor barrier?
Yes, proper ventilation in conjunction with a vapor barrier can help maintain humidity levels and protect against potential moisture buildup.
4. How do I know if my vapor barrier is working?
Check for signs of moisture, mold, or musty odors. Regular inspections will help ensure your vapor barrier is effectively preventing moisture intrusion.
5. Is professional installation worth it?
Professional installation can be beneficial as experienced contractors can identify issues you might overlook and ensure proper installation, saving time and potential future costs.


More Stories
Key Insights into American Standard Heat Pumps for Optimal Home Comfort
Choosing the Perfect Steel Sink for Your Kitchen: Key Considerations and Benefits
Revitalize Your Home with Elegant Showers Australia